When a shower in the bathroom starts leaking, it is very irritating for the house owner and his family. There is a lot of wastage of precious water, as drops of water continuously drip off the showerhead. Moreover, energy is also wasted when more water needs to be heated by the geyser during winter. Normally, a plumber is hired to fix this problem of shower leakage. However, many homeowners prefer to handle the leaking shower repairs by following some easy DIY procedures. This way they save lots of money and also avoid the hassle of searching for good plumbers in their localities.
#5 Simple steps adopted for leaking shower repairs are:
#1. Shut down water supply: First of all, the water supply to the showerhead should be turned off to minimise the water loss. There should be a shut-off valve in the bathroom that can stop the water supply to the shower and bathroom taps. Otherwise, the main water supply to the house should be turned off before leaking shower repairs.
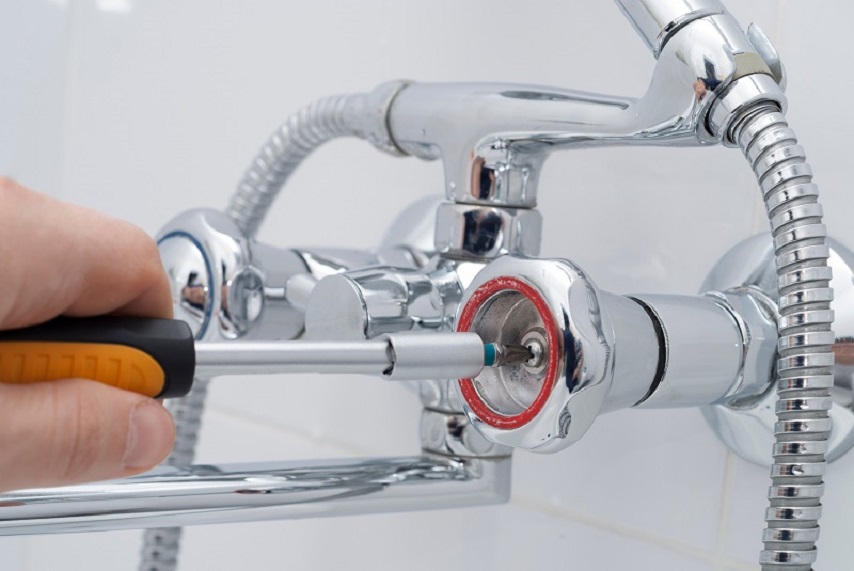
#2. Open up shower handle: Then the handle or knob of the shower should be opened to check if there is any problem. If the handle is tightened too hard for stopping water leakage, the valve inside may get damaged. A pocketknife is handy in opening the topmost cover of this shower handle. The inner screws need to be unscrewed with a screwdriver, which is an essential tool for leaking shower repairs.
#3. Replace the cartridge: When the entire shower handle is taken out, there is a long tubular inner part called cartridge. This cartridge is pulled out simply with pliers or a special cartridge puller according to the brand of the shower. Often this cartridge needs to be replaced with a new one, which is screwed up into exactly the same position as the earlier one.
#4. Take out the shower tap: If the leaking problem still exists even after replacing the cartridge, then the shower tap has to be removed for leaking shower repairs. A wrench or pliers may be useful for this job. All the water left inside the tap should be drained out. There is a rubber gasket inside the tap, which may become loose or cracked due to continuous use. Hence, this gasket should be replaced and it should fit perfectly inside the tap.
#5. Fix back the tap: The tap is placed back to its original position, with the help of wrench or pliers. The handle is also fixed tightly over the tap. Finally, the shower handle is turned on to check if there is any more leakage, after the water supply is restored. If there is a separate tap for the passage of hot water, that tap should be checked in same manner.

Also read: Make Your Bathroom Beautiful with Shower Screens
Prime reasons for seeking urgent leaking shower repairs
When water continues to leak from the shower, the bathroom always remains wet. Thus, there is high chance of causing moulds in the bathroom walls and floor, which demand immediate leaking shower repairs. A damp and mouldy bathroom is unhygienic for the family members. In winter, an electric heating system is often used for heating up the water in the bathroom. Thus, there is a lot of wastage in electrical energy, leading to a huge electric bill at the end of the month. Moreover, the aged people have a risk of slipping off on the wet bathroom floor and get gravely injured.
The house owner should hire an expert plumber of his locality, if he is not absolutely sure of handling the leaking shower repairs correctly. Any messy work may result in more damage of the shower parts, leading to more expenses.